Friday, December 28, 2012

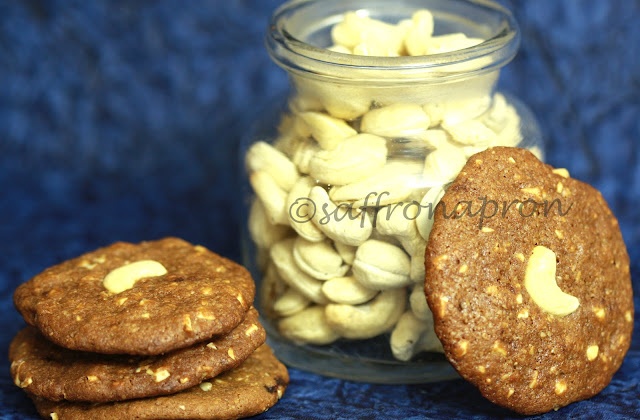
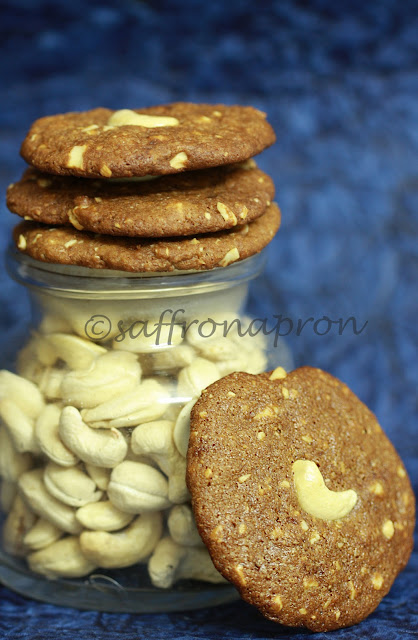
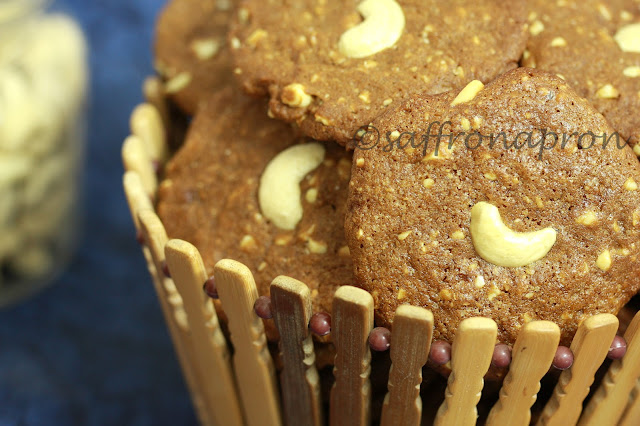
Cashew brown sugar cookies


Happy New Year to one and all. May the year ahead bring you all  health, wealth and happiness. Happy 2013 again.

For this special day, I have decided to post a special recipe. Hope you enjoy it :)


Ingredients: (Makes 3-1/2 dozen cookies)
  • 1/2 cup softened butter (115 gms) 
  • 1 cup brown sugar (firmly packed)
  •  1/2 cup fine white sugar
  •  1 whole egg and 1 egg yolk 
  • 1/3 cup heavy cream 
  • 1 tspn vanilla extract 
  • 2 cups all-purpose flour 
  • 3/4 tsp baking powder 
  • 3/4 tsp baking soda 
  • 1/4 tspn salt 
  • 2 cups chopped cashew (and more for garnishing) 
 Directions: 
  •  Preheat oven to 350 degrees F (177 degrees C). 
  •  Line cookie sheets with parchment paper.
  •  In a bowl, combine the flour, baking powder, baking soda and salt and set aside. 
  • In another large bowl, cream together the butter and sugars until light and fluffy. 
  • Add the eggs, beating well, then stir in the cream and vanilla. 
  • Gradually stir the flour mixture into the creamed mixture. 
  •  Fold in chopped cashew pieces. 
  • Drop by rounded spoonfuls onto the prepared cookie sheets and press down a little. 
  • Place half a cashew on each cookie center (optional) 
  • Bake for 10 minutes in the preheated oven. 
  • Allow cookies to cool on baking sheet for 5 minutes before removing to a wire rack to cool completely.
Photobucket

Monday, November 26, 2012

Appam and Stew


Diwali came with much excitement and enthusiasm. The house was cleaned spic and span. There was a sprawling rangoli at my door step and all the diyas glimmering away.  And then, all of a sudden, diwali came to an end with a lot of noise and air pollution.

Right now, we have bright sunny days in Bangalore. But, there is a chill wind indicating the onset of winter.  November is ticking away with only a few days left for everyone to start updating their new year's resolution. Can't believe that 2012 too is coming to a close. Wow! That was fast.  But, I'm looking forward to all the excitement coming up in December with Christmas and New year's and can't wait to try out some new restaurants this the festive season.


Coming to my recipe for today.  Appam and stew is a breakfast dish served in Kerala. It is a high calorie meal, but I or in fact we love it. Some folks like serving appam with milk an d sugar. But, i think that appam is best served with stew.  Click here for stew recipe.


    Ingredients:( Makes 16 appams)
    • Rice flour - 1-1/2 cups
    • Cooked rice - 1 cup
    • Grated coconut - 1 cup
    • Water - 3 cups
    • Coconut milk - 1/4 cup (optional)
    • Yeast - 1/2 tspn
    • Sugar - 2 tspns
    • Salt - to taste
    • Milk - 1/4 cup (optional)


    Directions:
    •  In 1/2 cup of warm water, add yeast and sugar and set aside for 5 mins.
    • Other than salt and milk, grind the rest of the ingredients together. Add proofed yeast mixture and let ferment for 5-6 hours. 
    • Just before making the appams, add salt and milk to the batter.
    • To make appam, pour one ladle of batter in a hot appam pan and rotate the pan so the batter coats the sides of the pan. Cover and let cook for 2-3 mins. And serve hot (Appams are cooked only on one side)
    • I have demonstrated how to make appam with pics.
    • Best served with stew. Click here for stew recipe.


    Photobucket

    Monday, November 5, 2012

    Vanilla Cupcakes


    Last weekend started on a boring note. We had no plans to leave the house as  hubby-dear needed to just laze around and relax for a change. Relaxation for him is reading about photography and watching MMA and sports. For me, I had to think of a way to do something nice. So, as usual, I turned to the kitchen to bake. Now, that's what I call relaxation.


    My sister sent me 10 individual  cupcake baking cups. These are so much nicer than the muffin trays because there is more space utilization in the oven. Also, helps me bake just a few, instead of a whole big batch. Loved the idea and had to put these cuties to use. That's when I made my Apple-raisin-walnut muffins (click here for recipe). After that venture, these babies were put away and only now did I think of them again.

    So, my weekend relaxation resulted in vanilla cupcakes. They were moist and delicious and this brought hubby's resting phase to a halt as he got busy.............. really busy, munching on these moist cupcakes..............non stop.
     

    Ingredients: (makes about 12 cupcakes)


    • 1-1/2 cup sifted cake flour
    • 1-1/2 tspn baking powder
    • 1/4 tspn salt
    • 1/2 cup or 1 stick unsalted butter, softened
    • 1 cup(s) sugar
    • 2 large eggs, room temperature
    • 1/2 teaspoon(s) vanilla extract
    • 1/2 cup(s) whole milk
    Directions:
    • Preheat the oven to 180°C or 350°F.
    • Line a cupcake tray or cups with liners.
    • In a bowl, mix together flour, baking powder and salt. 
    • Beat the butter until creamy. Add the sugar and beat well for about 5 minutes, scraping the bowl when needed (batter should be nearly white and fluffy). 
    • Add eggs, one at a time, beating well after each addition.
    • Add vanilla and mix. 
    • Now, alternately, add the flour mixture and milk, starting and ending with flour until just mixed.
    • Divide the batter into the cupcake liners until 2/3 full (I used an ice cream scoop which was the perfect amount to fill 1 cupcake). Bake for 20-25 mins, until a toothpick inserted comes out just clean.
    • Cool for 5-10 minutes on a rack.

    Thursday, October 18, 2012

    Creme Brulee


    I'm hard to please when it comes to eating out. I expect food to be really, really tasty at restaurants and anything otherwise is simply unforgivable. We went out to this restaurant called Turquoise in Koramangala. We went to the Italian kitchen floor. I never get too excited before I start my meal as it mostly leads to disappointment.  But, this time, I really loved the food and the ambiance. We had some good veg crostini misti, which is toasted Italian bread with a savory assortment of mushrooms, tomatoes and ricotta cheese.  For main, I had a chicken cappellacci which was a stuffed chicken pasta . The dim-lit environment did not give me an opportunity for good snaps with my point and shoot :( 

    When it came to dessert, I had to have tiramisu and he had creme brulee.   I loved it and so, as you can guess, I had to try creme brulee at home and here is my home-made dessert. Did some research on this dessert and came to know that creme brulee means burnt cream. Origin of creme brulee? Some say it's, English, some say French and some say Spanish. You'll never know.


    The biggest challenge in this recipe was to create that caramel crust on the dessert without a blow torch. But, my oven was good enough for the job and everything turned out great.

    Ingredients (serves 2)

    • 3 egg yolks
    • 4 tablespoons white sugar
    • 1/2 teaspoon vanilla extract
    • 3/4  cup heavy cream
    • 1/4 cup milk
    For topping:
    • Fine sugar - 1 tbspn 

    Directions


    Directions

    • Preheat oven to 150°C (325° F).  
    • Heat a kettle of water and keep ready.
    • Beat egg yolks, sugar and vanilla in a mixing bowl until thick and creamy.
    • In a saucepan, pour cream and milk  and stir over low heat until it almost comes to boil. Remove from heat immediately. Let rest for 10 mins.
    • Stir cream-milk mixture into the egg yolk mixture. Beat until combined and it turns a light color. 
    • Pour the liquid into 2 ramekins. Place the ramekins into a large cake pan or roasting pan. Pour enough hot water into the pan to come halfway up the sides of the ramekins. 
    •  Bake just until the creme brulee is set, but still trembling in the center, approximately 40-45 minutes. Remove the ramekins from the roasting pan and let cool for a while. Then refrigerate for at least 2 hours or overnight.
    Method for creating a caramel crust:
    • Preheat oven to broil. (250°C or 480°F)
    • Sift some fine sugar evenly over the custard and spread till the edges.  
    • Place ramekins on the highest rack position, right under broiler until sugar melts. (about 2 minutes) Watch carefully in order not to burn.
    • Remove from heat and allow to cool. Refrigerate until custard is set again. 
    Note:
    • It is best to caramelize the crust about an hour before serving the pudding . That way the crust remains crisp and does not get soggy when left for too long in the refrigerator.

    Photobucket

    Friday, October 5, 2012

    Tomato soup


    I had a lot of tomatos in my refrigerator and right away, I knew what to make off it. Tomato soup of course and with the start of the cold season, what's better than some piping hot soup.

    Have I ever mentioned how much I hate packaged soups. They taste horrid. I tried a few brands a few years ago and I have never bought a packet ever since. Some are so gummy from all the corn starch used. Some are too sweet from the abundance sugar added. The worst part is the addition  of Monosodium glutamate or  MSG, also known as the "infamous" Ajinomoto. Ugh! Makes me lose my appetite.

    So, instead of cribbing about bad soup, why not make some good soup at home.


    I use cashew paste as a substitute for corn starch to thicken my soup. The depth of tomato flavor in this soup is very refreshing.

    I would have loved some croutons as a garnish on them as well. But, I had run out of bread :(


    Ingredients:

    • Butter – 2 tspns
    • Oil- 1 tbspn
    • Onion – 1medium
    • Peppercorns –7-8
    • Bay leaf – 1
    • Cloves- 3
    • Garlic – 4 large cloves
    • Carrot – 1/4 of a medium sized carrot
    • Cumin seeds – 1 tspn
    • Chilli powder – 2 tspns
    • Tomatoes – 8 large
    • Water – 2 &1/2 cups
    • Raw cashews - 5 (ground to a smooth paste)
    • Sugar –  1 tspn ( I used brown sugar)
    • Salt - to taste
    • Cracked pepper – to taste
    • Coriander leaves – to garnish
    • Cream – 4 tspns (optional) 

    Directions: 
    • Heat 1 tspn butter and oil in pressure cooker pan. Add onions,  bay leaf, cloves, pepper corns and garlic. Saute till transparent . 
    • Add cumin, carrots, chilli powder and salt. Add tomatoes and sauté for 2 mins. 
    • Now add water and close pressure cooker . Cook for 3 whistles.
    • Then remove the bay leaf and cloves and discard. Puree the rest of the mixture in a juicer and sieve.
    • Now, on a low heat, add remaining 1 tspn butter in a  pan. Add the cashew paste and saute for a minute. (Cashew paste acts as a thickening agent)
    •  Add the extracted tomato puree. Add sugar . Stir well. for a few mins. till the soup thickens.
    • Add pepper  and salt to taste.
    • Garnish with coriander leaves and cream.

    Friday, September 21, 2012

    Paneer paratta


    I get fresh paneer from a vendor near my home. It's so fresh and has a crumbly texture to it, quite similar to home-made paneer and very unlike the perfect squares of packaged processed paneer that you get on store shelves. I was sure to put it to good use.  Hubby dear said paneer paratta .
    So, paneer paratta it was.


    This paratta tastes great by itself. It does not need any heavy gravies to accompany it. The best side-dish would be a light raita or pickles. An easy high protein meal, but paneer has high fat content too :(


     Ingredients for paratta dough: (makes 10)
    • Whole wheat flour - 3 cups
    • Olive oil - 2 tspns
    • Salt - 1tspn
    • Water - as needed
    For filling :
    • Grated or crumbled paneer - 200 gms
    • Onion - 1 medium (finely chopped)
    • Green chilies - 3-4 (finely chopped)
    • Coriander leaves (finely chopped) -  5 tbspns
    • Garam masala - 1 tspn
    • Salt - to taste
    Directions for making dough: 
    • Mix salt and flour.
    • To the flour, add oil and enough water . Knead to a soft, pliable dough.(Knead for about 5-8 mins)
    • Make a ball of the dough, cover and keep aside for 15-20 mins.
    • Divide the dough into 10 equal sized balls.
    For the filling: 
    • Combine all the ingredients in a bowl and mix well. Keep aside.

    Directions for making the stuffed parattas:

    • Flatten and roll out each ball of dough to about 2 inch diameter.
    • Place a tbsp of the filling in the centre. 
    • Cover the filling by gathering the edges and making it into a pouch. 
    • Press and roll out ,using little flour, into a small round parathas. (these 4 steps are portrayed in my collage)
    • Cook the parattas on a hot tava, using little olive oil. Cook on both sides, till brown spots appear.
    • Serve hot.
    Photobucket

    Wednesday, September 12, 2012

    Banana fritters/ Pazham pori


    Today, I'm going to confess my weakness. When we used to travel to Kerala for our vacations, the train journey was what we looked forward to. Not for anything else, but the banana fritters sold at the Shornur and Palghat stations. They are called pazham pori literally meaning banana fry. Oh boy, were they delicious!  
    Hence, here I am, shamelessly admitting to eating unhygienic, Indian railway station food. I confess to still loving them, but, don't eat them at the station anymore, as I prefer homemade.


    When I first made these fritters at home, a few years ago, I did a shabby job. (I'm sure that it is all in the game for beginners). When I dipped the sliced bananas in batter and fried them, most of the fritters had extensions, which I used to call hands, legs and fingers and they almost looked like tadpoles. But these days I do a better job and make a batter of better consistency. 


    This snack is made rarely at home, since it involves deep frying. So, this treat is thoroughly enjoyed as it is an occasional one. It is a great tea-time snack and a wonderful comfort food for the  monsoons.


    Ingredients: (Makes 6 fritters)
    • Ripe plaintains (nendran) - 2
    • All purpose flour - 3/4 cup
    • Salt - a pinch
    • Sugar - 1 tspn
    • Turmeric powder - 1/2 tspn
    • Water - 1 cup
    • Oil - for deep frying.
    Directions :
    • Heat oil in a deep pan to a temperature of 375°F.
    • In the mean time, make a batter with the flour, sugar, salt, turmeric and water. Whisk well to avoid lumps.
    • Peel and slice each plantain lengthwise into 3 pieces.
    • Dip each slice in batter separately and deep fry till golden.


    Monday, September 3, 2012

    Chicken sandwich with red pepper relish and guacamole


    Let's talk sandwiches today. I wonder why I never run out of ideas to make sandwiches. Maybe because I love them so. For this one, I shallow fried a spicy chicken breast in olive oil, made a relish of red peppers and caramelized onions,made guacamole (Click here for guacamole recipe) and to top it all grated a bit of sharp cheddar cheese. After all this work I was not going to ruin it by using plain slice of bread. So, I got a good crusty white bread , which is a rare sight in my home. I always opt for healthy whole wheat bread. But, once in a blue moon, it's fine to use white bread.  Right? 


    Assembling was fun and I just kept piling layers and layers on. First, I slapped on some creamy guacamole. Then the relish went right on, then the chicken and then the cheese. No butter on this one. This sandwich makes for a good lunch or dinner :). For us it was weekend brunch.


    Ingredients: (serves 2)

    • Good, crusty, long white loaf like ciabatta or baguette
    • Red pepper - 1
    • Onions- 2
    • Dried oregano - 1/4 tspn
    • Garlic - 2 cloves
    • Olive oil - 2 tbspns
    • Garlic paste - 1/4 tspn
    • Chicken breast - 1 pc
    • Paprika powder or Kashmiri chili powder - 1 tspn
    • Garam masala - 1/4 tspn
    • Guacamole - 1/2 cup (Click here for recipe)
    • Sharp cheddar - to taste
    • Salt - to taste
    Method:
    • Cut chicken breast lengthwise into 2.
    • Marinate with chili powder, garam masala, garlic paste and salt for an hour.
    • Shallow fry the chicken in 2 tbspns olive oil. Set chicken aside. Reserve the oil for making relish.
    • Now, for the relich, slice onions and red pepper.
    • Chop garlic finely.
    • Saute garlic in the reserved olive oil. Add onions and peppers and saute.
    • When slightly caramelized and golden, add oregano and salt.
    Assembling:

    • Slice the loaf horizontally. 
    • On lower half, slather some guacamole.
    • Add the onion-pepper relish.
    • Top with chicken and finally grate some cheese on top. 
    • Close sandwich and enjoy.


    Tuesday, August 28, 2012

    Potato Stew


     HAPPY ONAM everyone.

    Posting the recipe for a kerala-style potato stew. This stew is usually served with appam and it is also served as an item on the sadhya ela (authentic kerala lunch) . I make my stew in a pressure cooker and I feel it is the easiest way to go about, without consuming much time. Very easy recipe.

    Ingredients: ( serves 4)
    • Potatoes - 4 medium (each cut into 6 pieces)
    • Onions - 2 (sliced)
    • Ginger - 2 tbspns (chopped)
    • Green chilies - 3 (slit)
    • Curry leaves - 1 sprig
    • Pepper corns -  1 tspn
    • Coconut milk - 200 ml
    • Water - 2 cups
    • Coconut oil - 1 tspn (optional)
    • Salt - to taste
    Directions:
    • In the pressure cooker, take 100 ml of coconut milk and add the water
    • Add the potatoes, onions, ginger, chilies, pepper corns and salt
    • Cook for 3 whistles and turn off the heat.  
    • When the pressure has released from the cooker, open it and add the remaining coconut milk, curry leaves and coconut oil and simmer for 5 mins.


    Here are some recipes which you might find useful this onam.

    Sambar

    Moru kootaan

    Avial

    Cabbage thoran

    Chammandi 

    Sambaaram

    Paruppu payasam / paruppu pradhaman

    Ela ada


    Photobucket

    Wednesday, August 22, 2012

    Easy trifle pudding


    This has been in my draft for almost a year now. It is a trifle pudding recipe. I made this when my cousins came over for a meal. Actually, I had made a plain vanilla cake at home then.( Click here for plain cake recipe) But, I did not want to serve the same boring thing. So, I thought a trifle pudding would be more fun for a change.


    The layers in the pudding were vanilla cake topped with a banana custard. Then came a layer of cranberry jelly. Then some slightly sweetened whipped vanilla cream and then some chocolate-cream-cookie crumbs. These layers were repeated.


    Ingredients:

    • Bourbon cookies - 6-8 (optional)
    • Plain vanilla cake - 1/2 kg ( click here for recipe )
    • Cranberry jelly - 4 cups ( recipe below)
    • Custard - 4 cups ( made according to box directions)
    • Chiquita banana -1
    • Heavy whipping cream-  1/2 cup 
    • Powdered sugar - 3 tspns

     Method for making cranberry jelly:


    • In a pan heat 1/4 cup of water and 1/4 cup cranberry juice.
    • Add 3-1/2 tspns of gelatin. When the gelatin has dissolved completely, turn off the heat. Add the remaining cranberry juice and stir. 
    • Cool and let set in the refrigerator for 3-4 hours.
    Making banana custard and whipping cream:
    • Make custard according to package directions
    • When it is cool, add slices of Chiquita banana to the custard stir gently. 
    • Refrigerate.
    • In a clean bowl, whip cream to stiff peaks with powdered sugar. Let cook in the refrigerator.
    Assembling: 
    • In the serving dish layer some slices of cake.
    • Pour 2 cups of banana custard on the cake layer.
    • Then spoon some jelly as the next layer.
    • Then add dollops of the sweetened whipped cream.
    • Crush some bourbon cookies and make this the next layer.
    • Repeat these layers again.
    • Serve cool

    LinkWithin

    Related Posts Widget for Blogs by LinkWithin

    BlogRoll